Detailed instructions on how to use the cape site
Step 1: Go to the Hypixel server.
Step 2: Press the right Shift key.
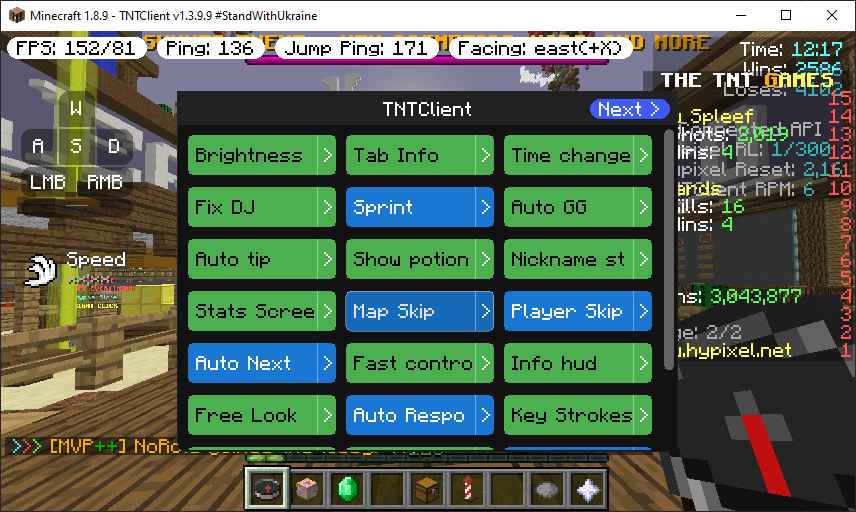
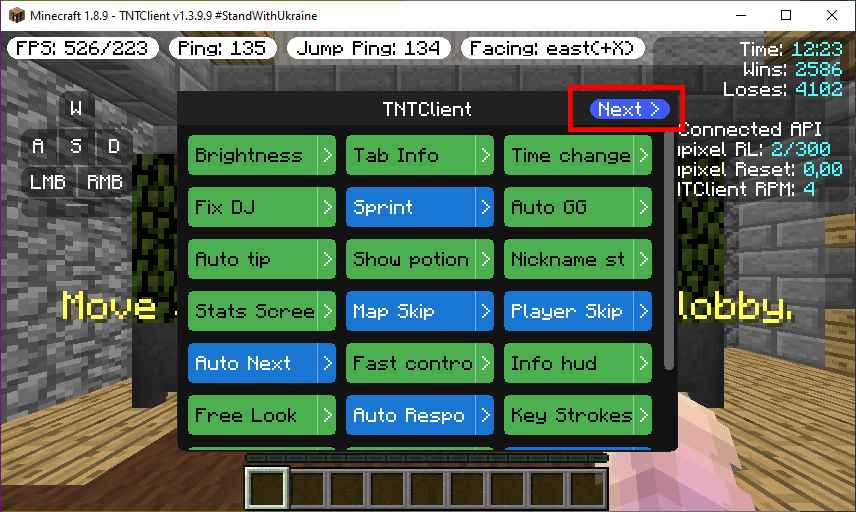
Step 3: Click on the "Next >" button.
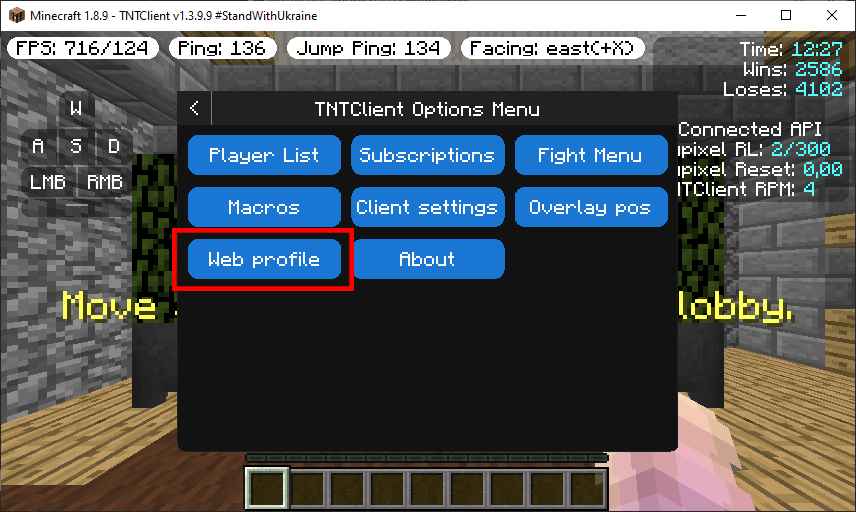
Step 4: Click on the "Web profile" button.
Step 5: Click on the "Open a web profile" button.
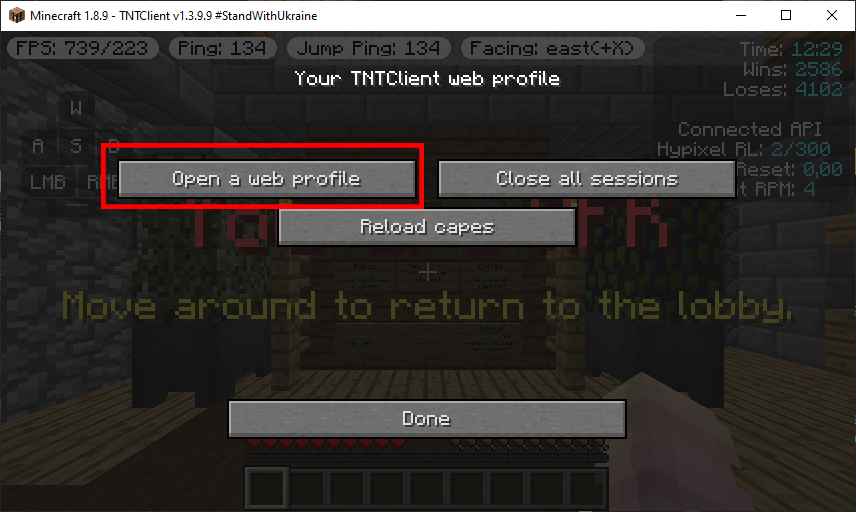
Step 6: Looking at the result.
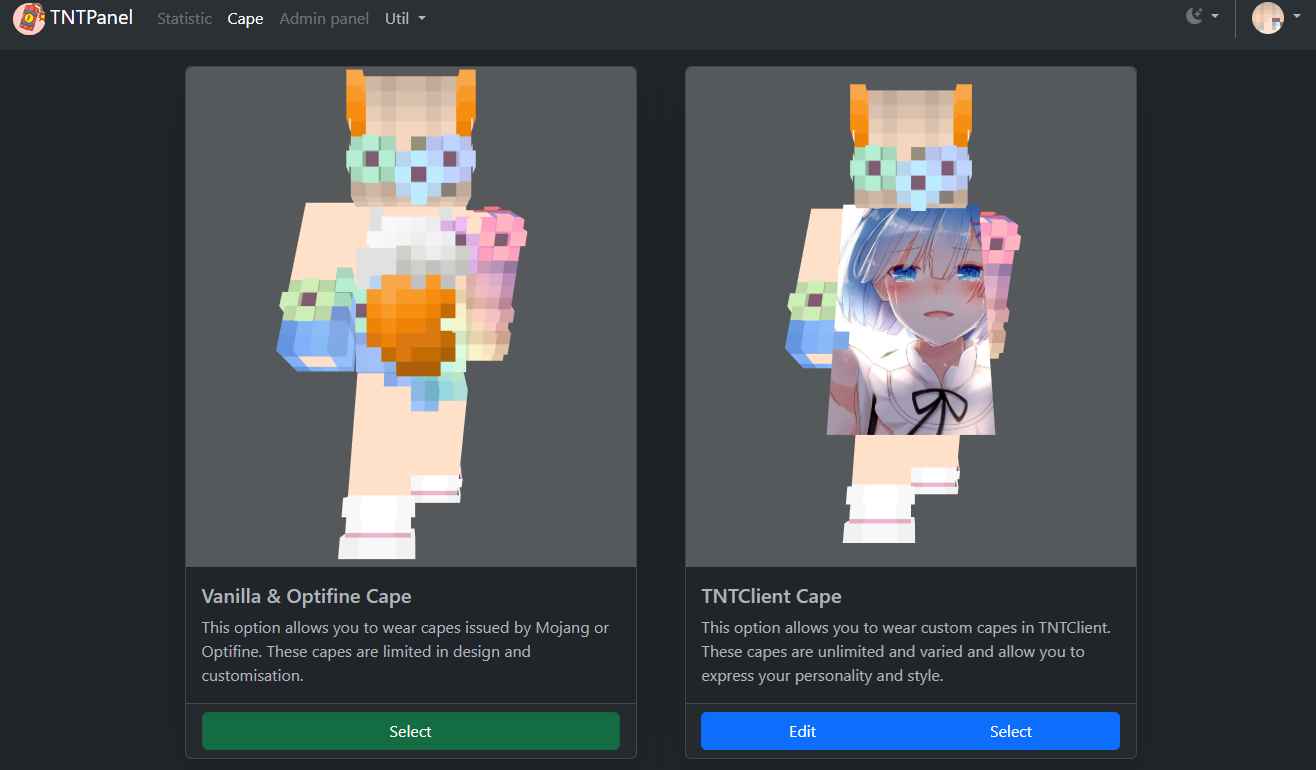
Step 1: Click on your skin icon in the top right corner.

Step 2: Click on the "Sign out" button.
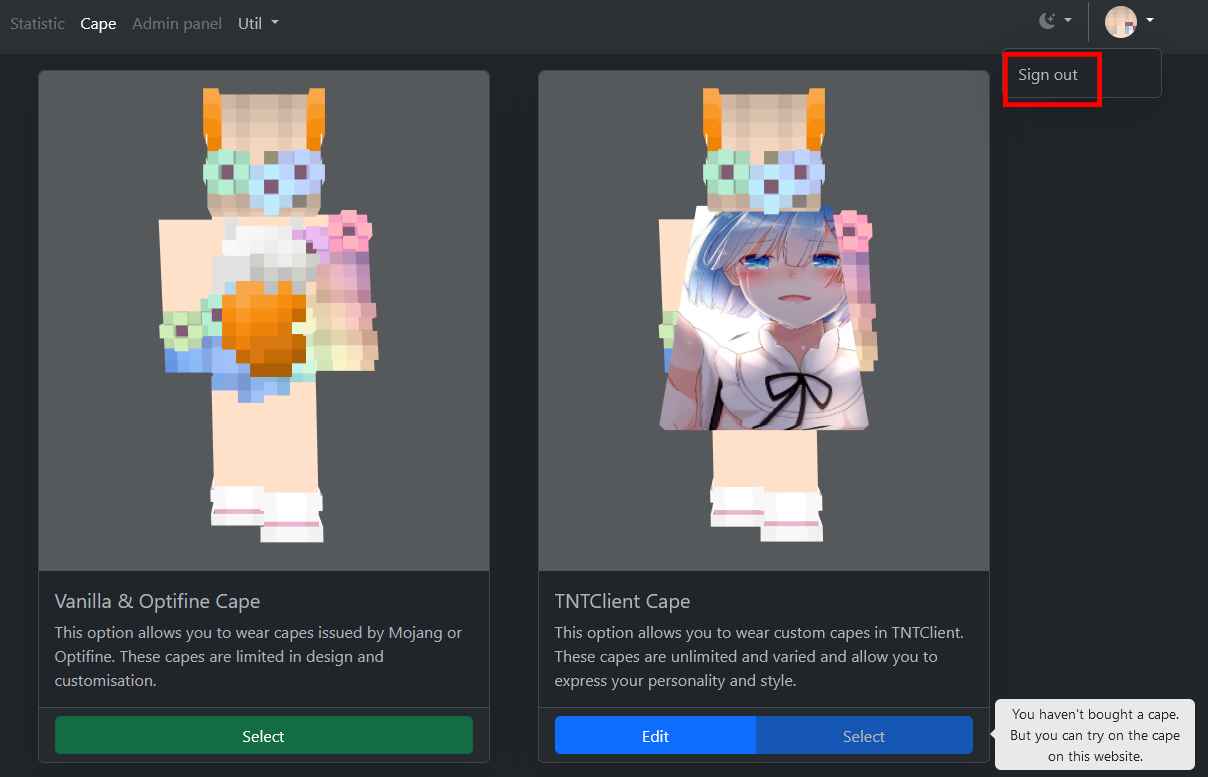
Step 3: You will see a message like the one below, then close the website tab.

Step 4: Follow all the steps described in Chapter 1.
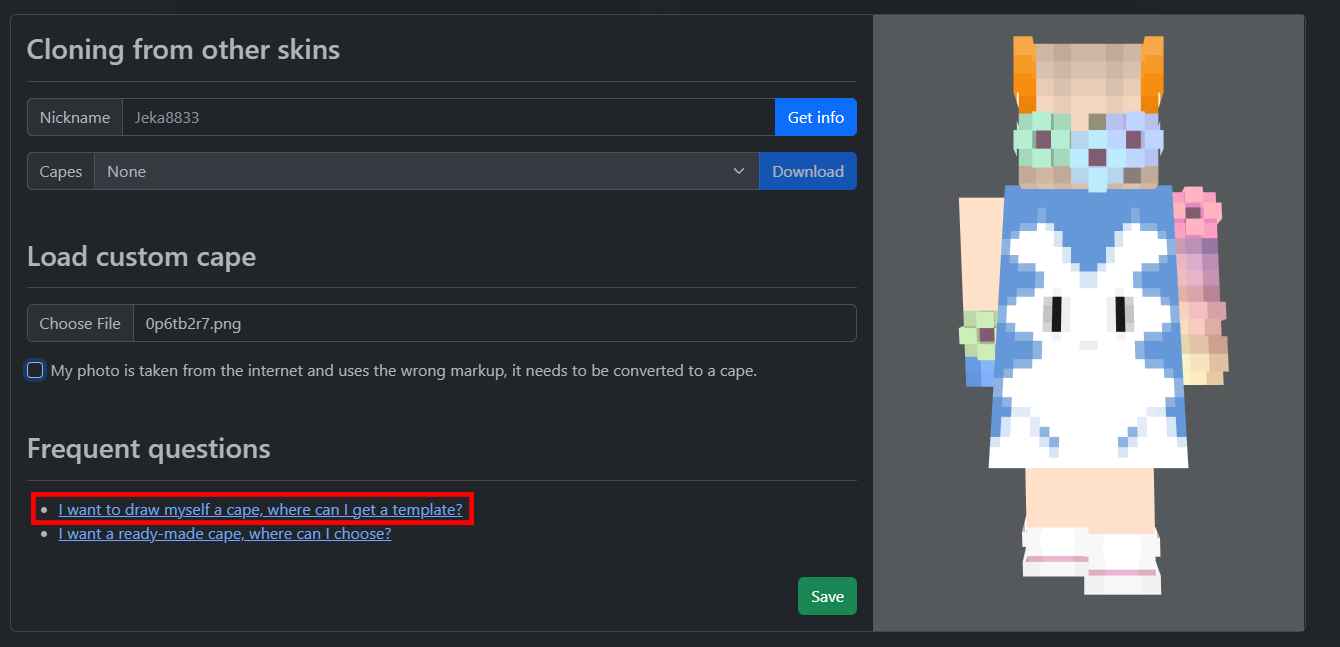
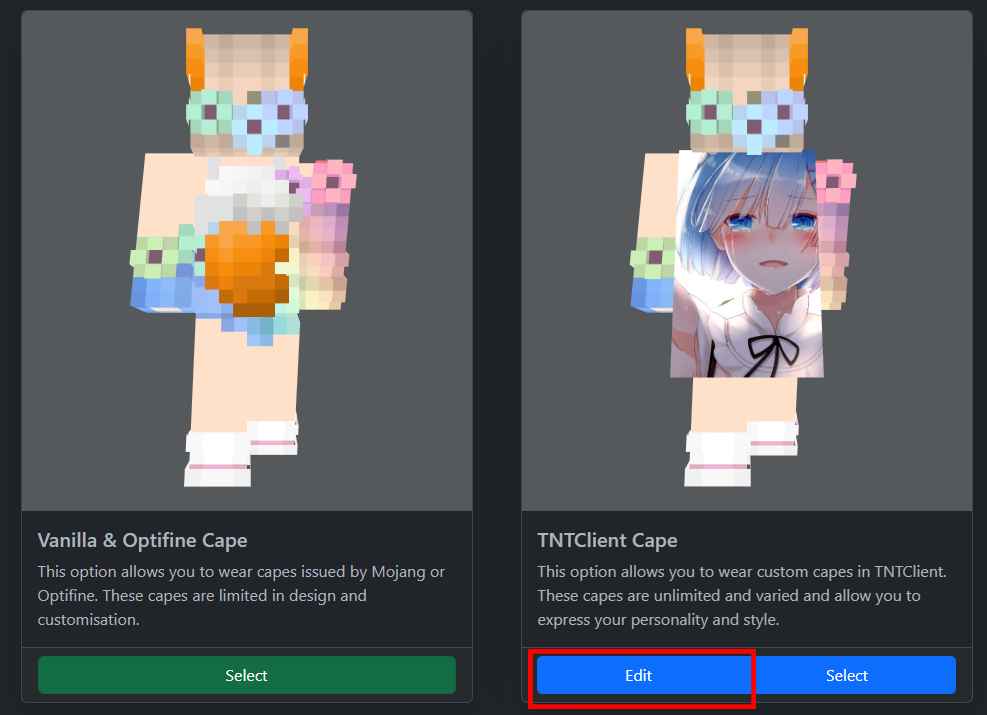
Step 1: Click on the "Edit" button.
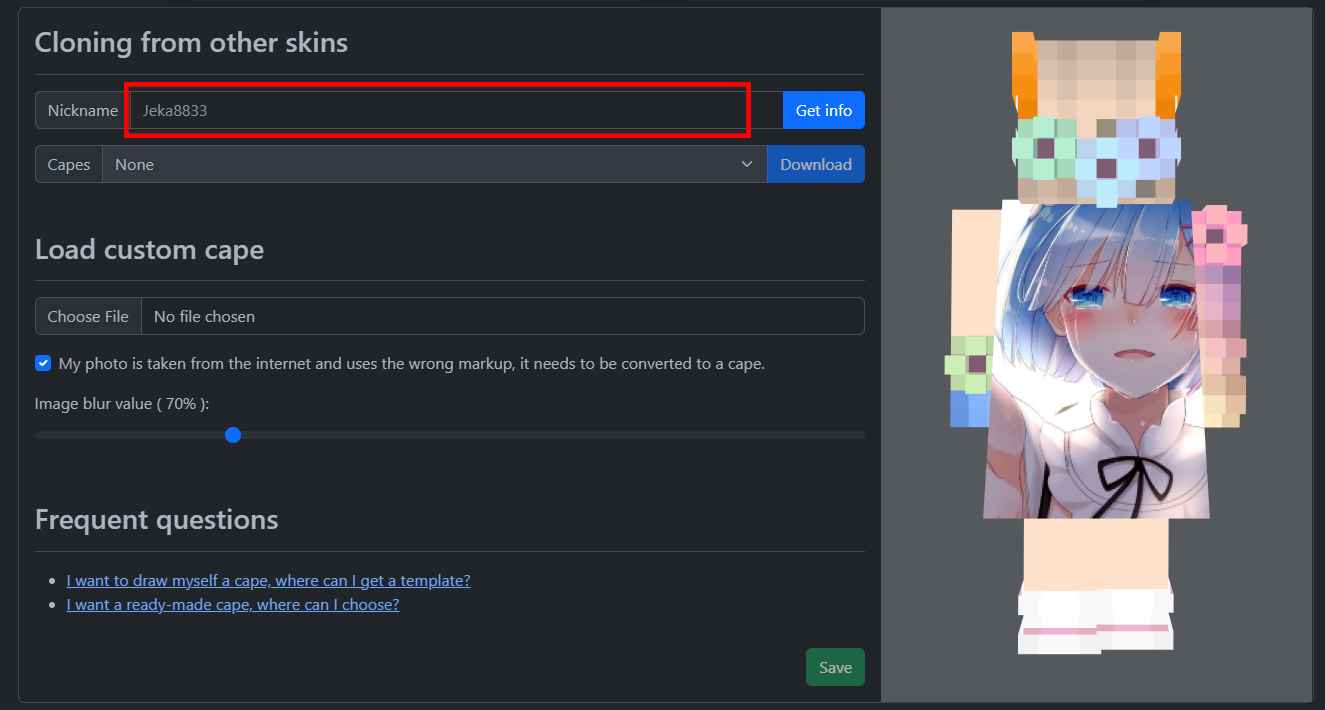
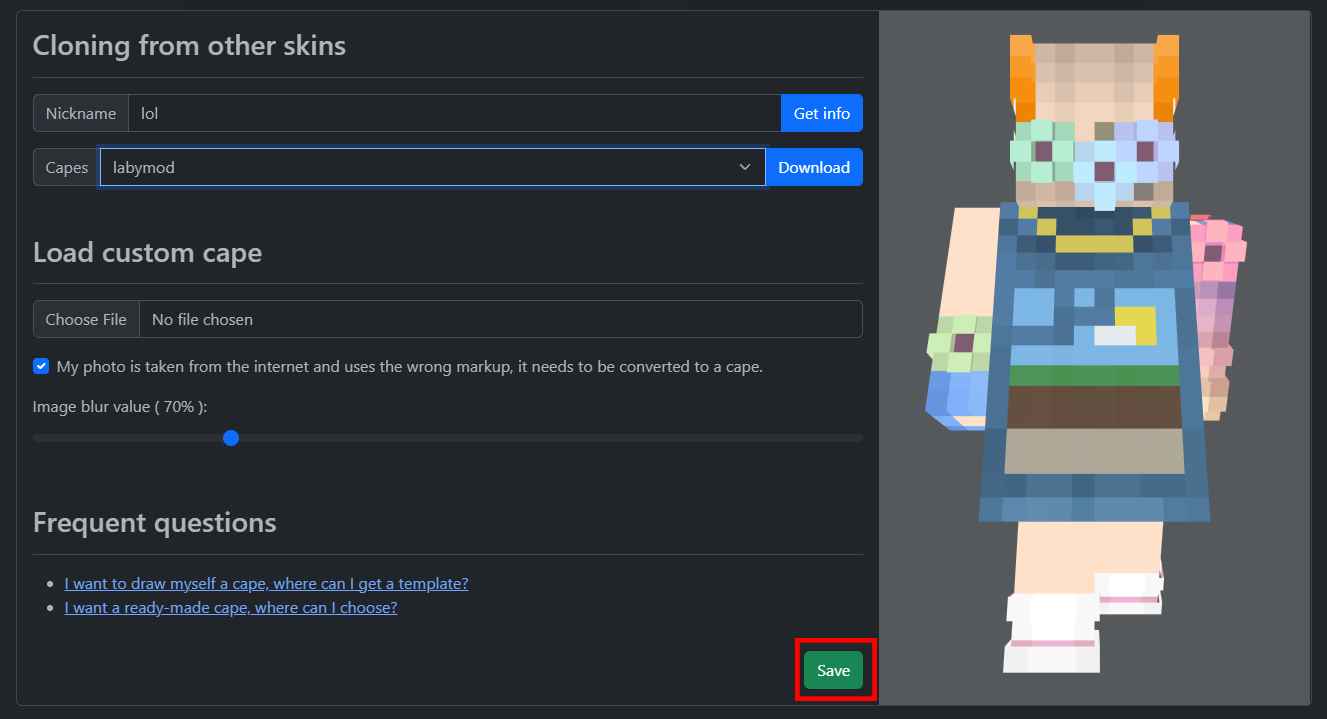
Step 2: Enter the name of the person you want to borrow the cape from.
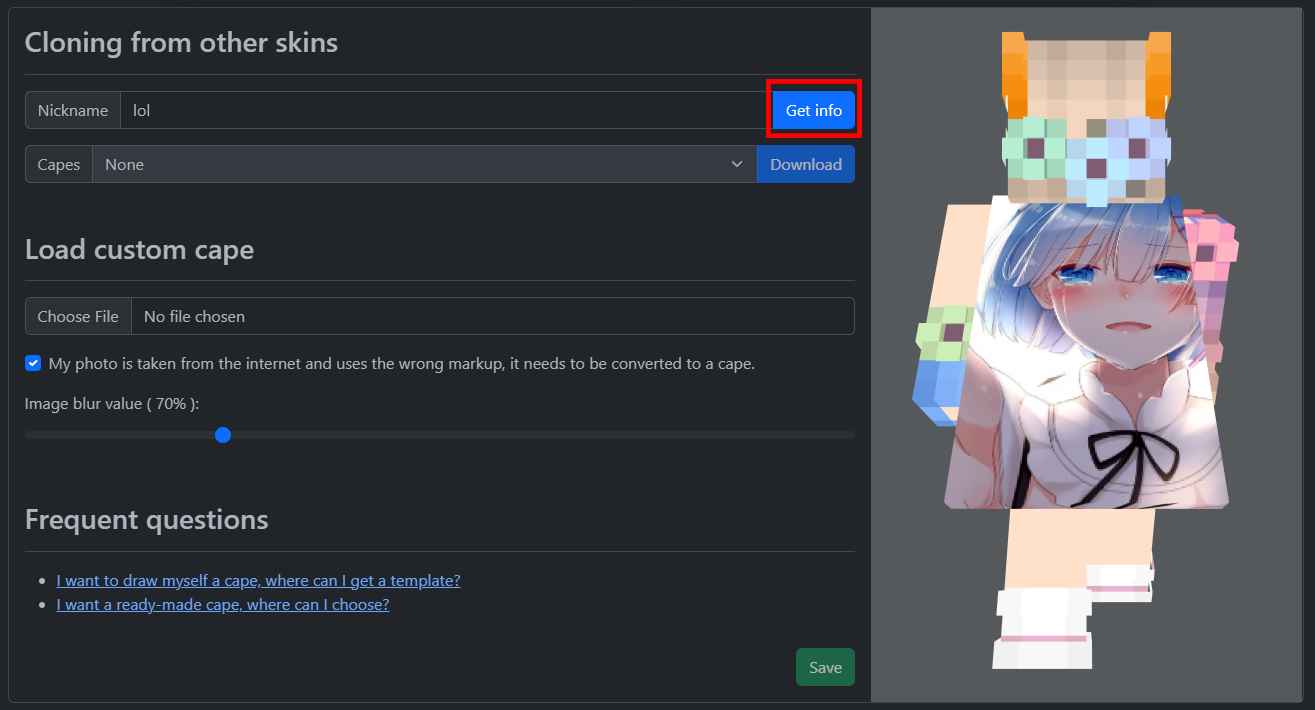
Step 3: Click on the "Get info" button.
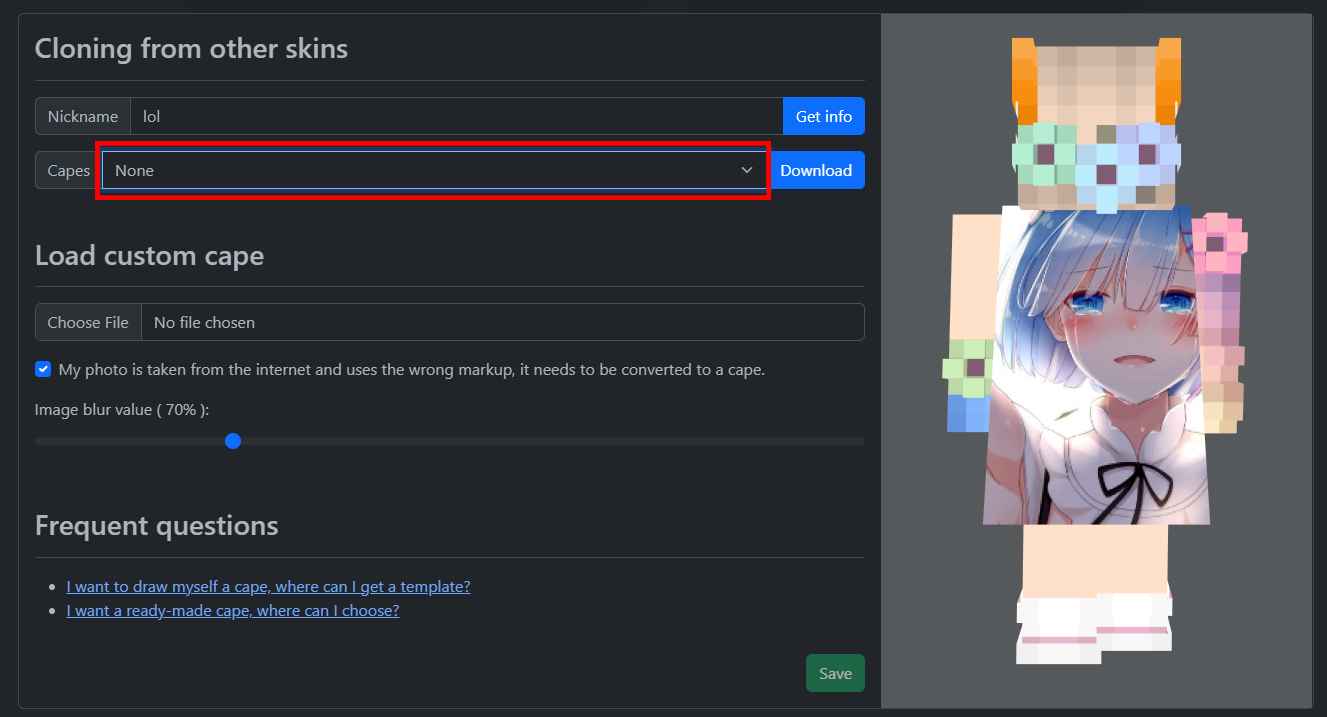
Step 4: Click on the "None" button, if nothing happens, the player has no cape.
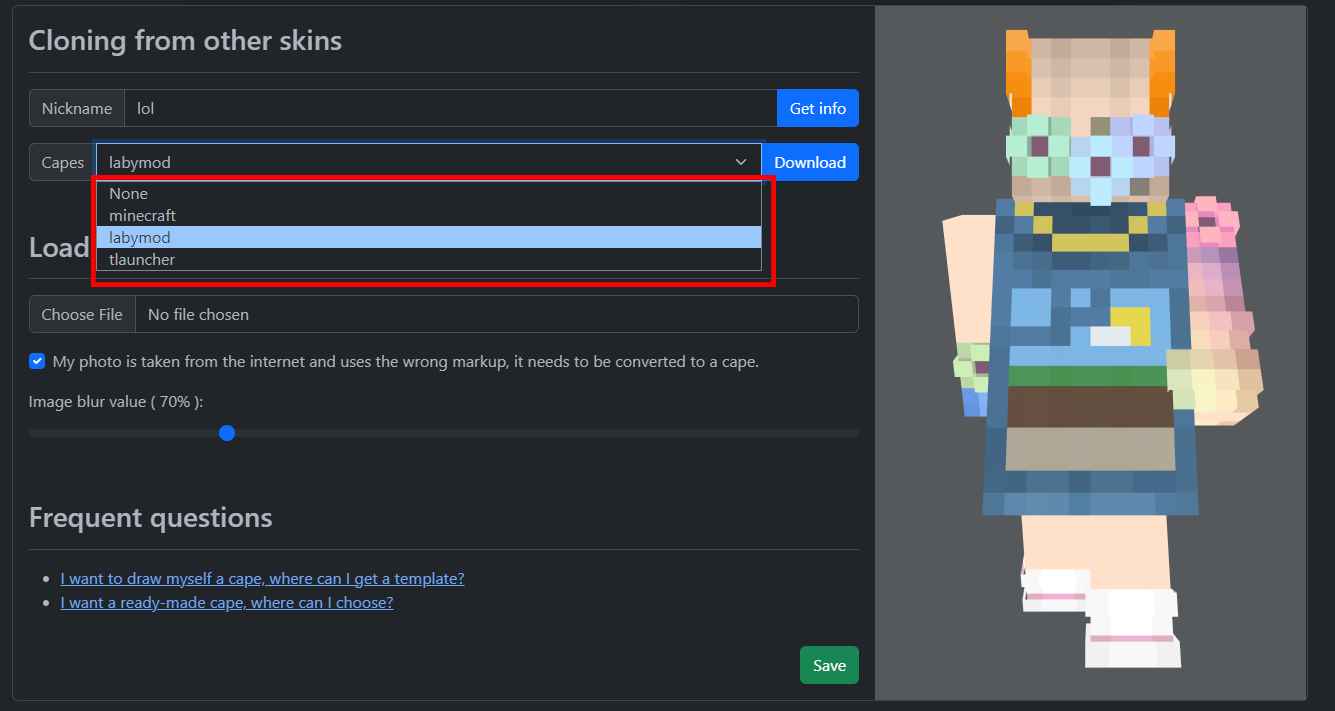
Step 5: Choose what you like.
Step 6: Click on the "Save" button.
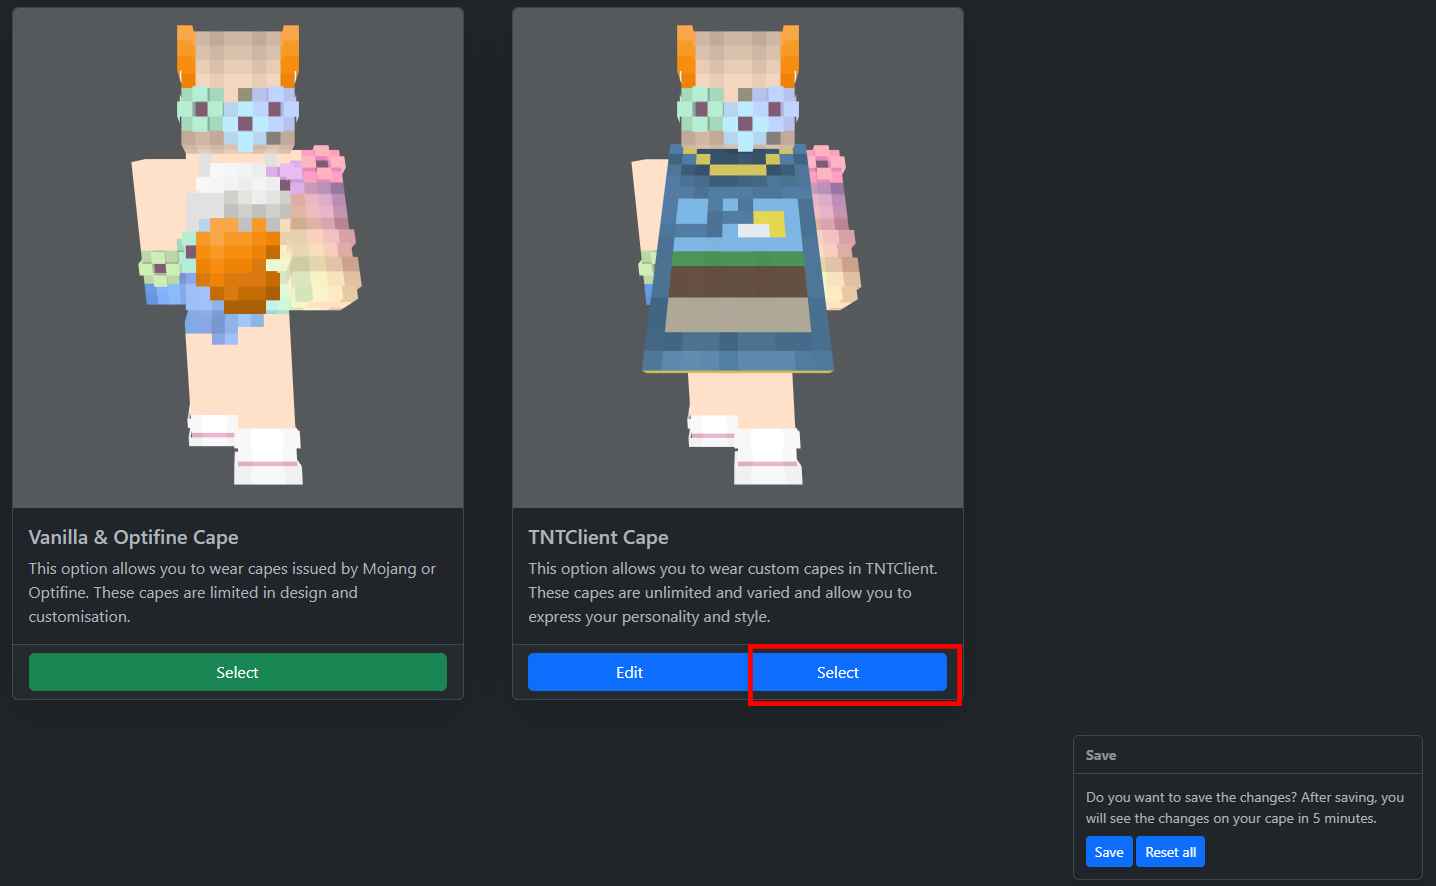
Step 7: Click on the "Select" button to select the TNTClient cape.
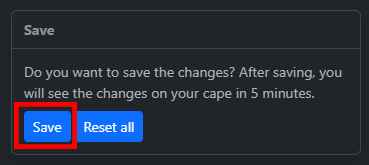
Step 8: Click on the "Save" button and wait five minutes.
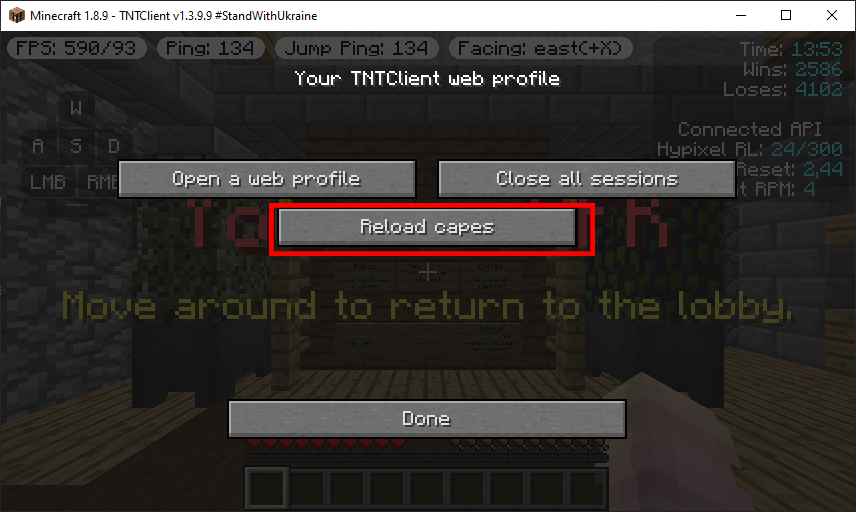
Step 9: Press the "Reload capes" button to reload the cape. If you do not see the cape, press the button again after 5 minutes.
Step 1: Click on the "Edit" button.
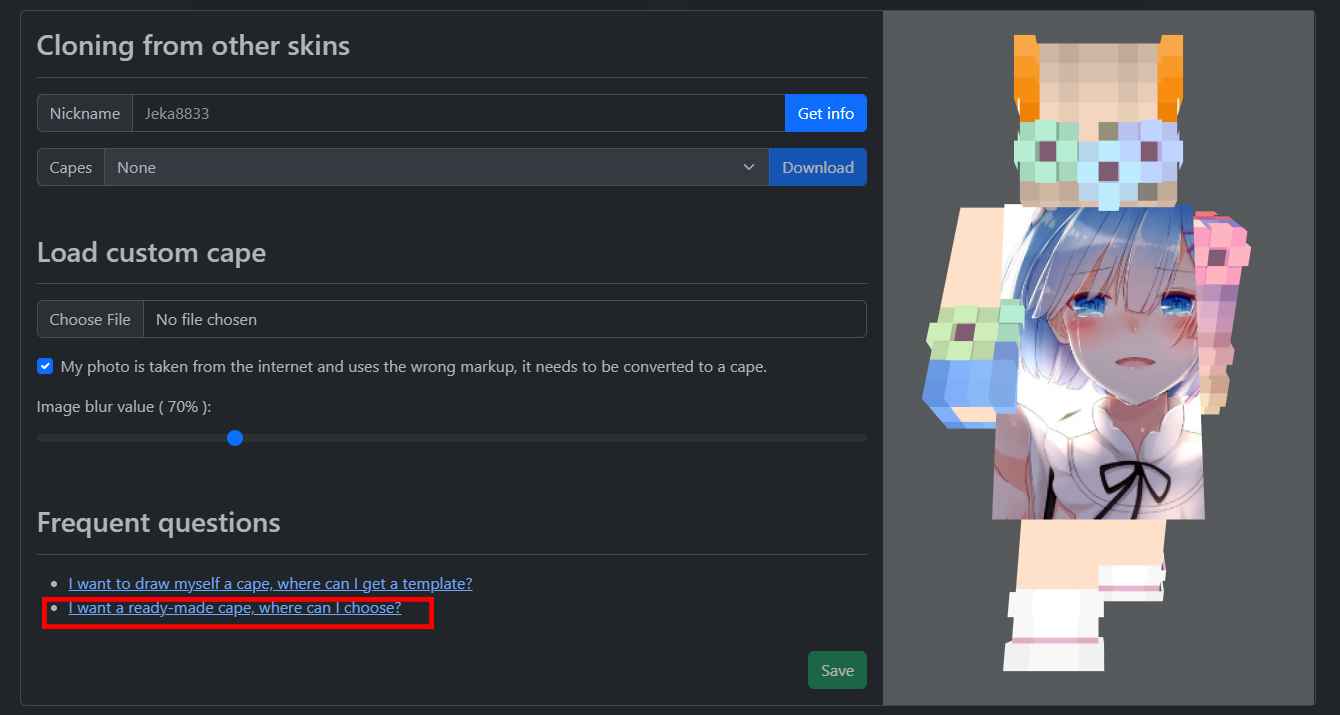
Step 2: Click on the link "I want a ready-made cape, where can I choose?" or look for any other sites where you can download capes.
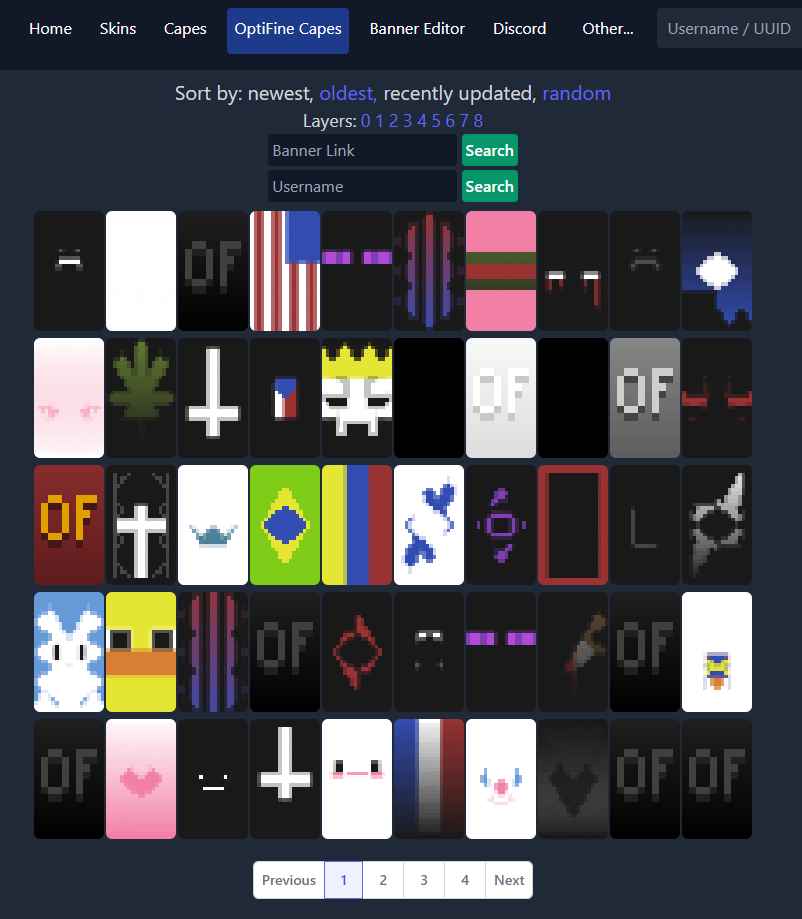
Step 3: Choose any cape you like; you can choose not from this website if you like.
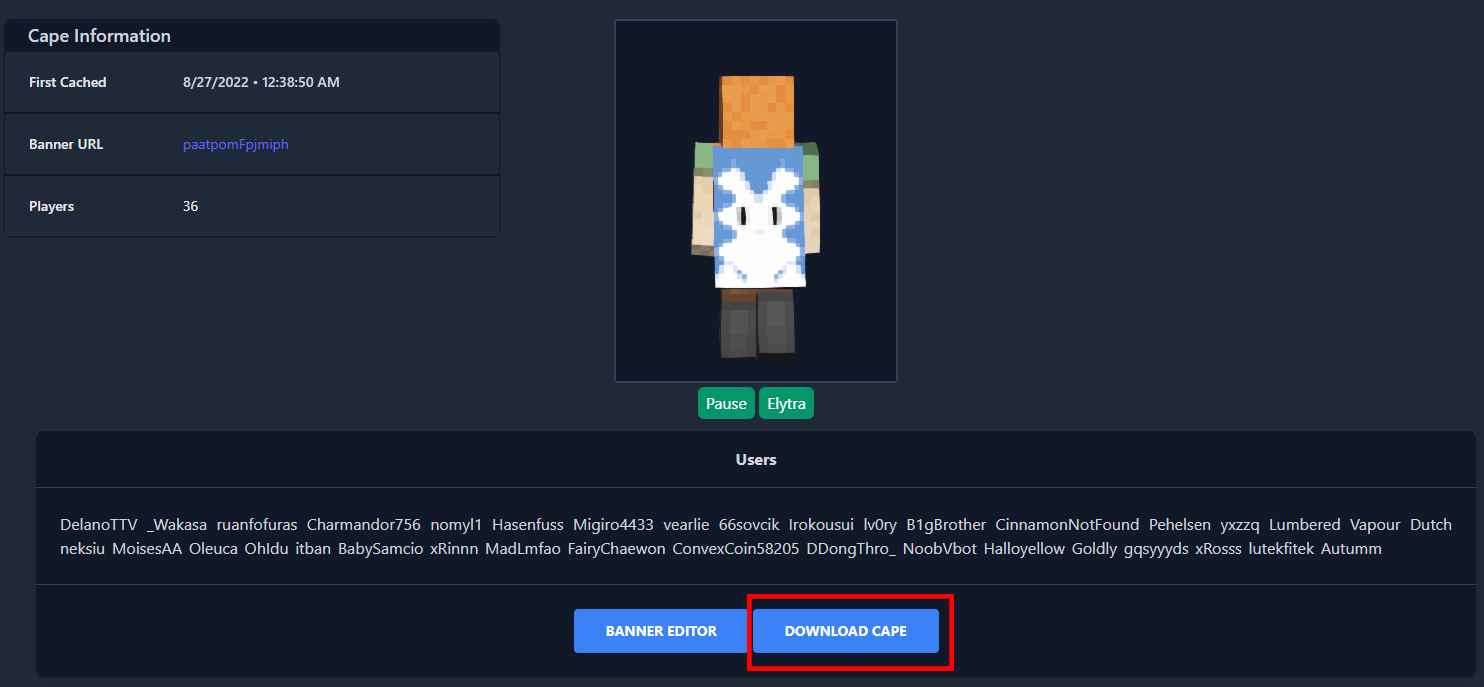
Step 4: Download the cape.
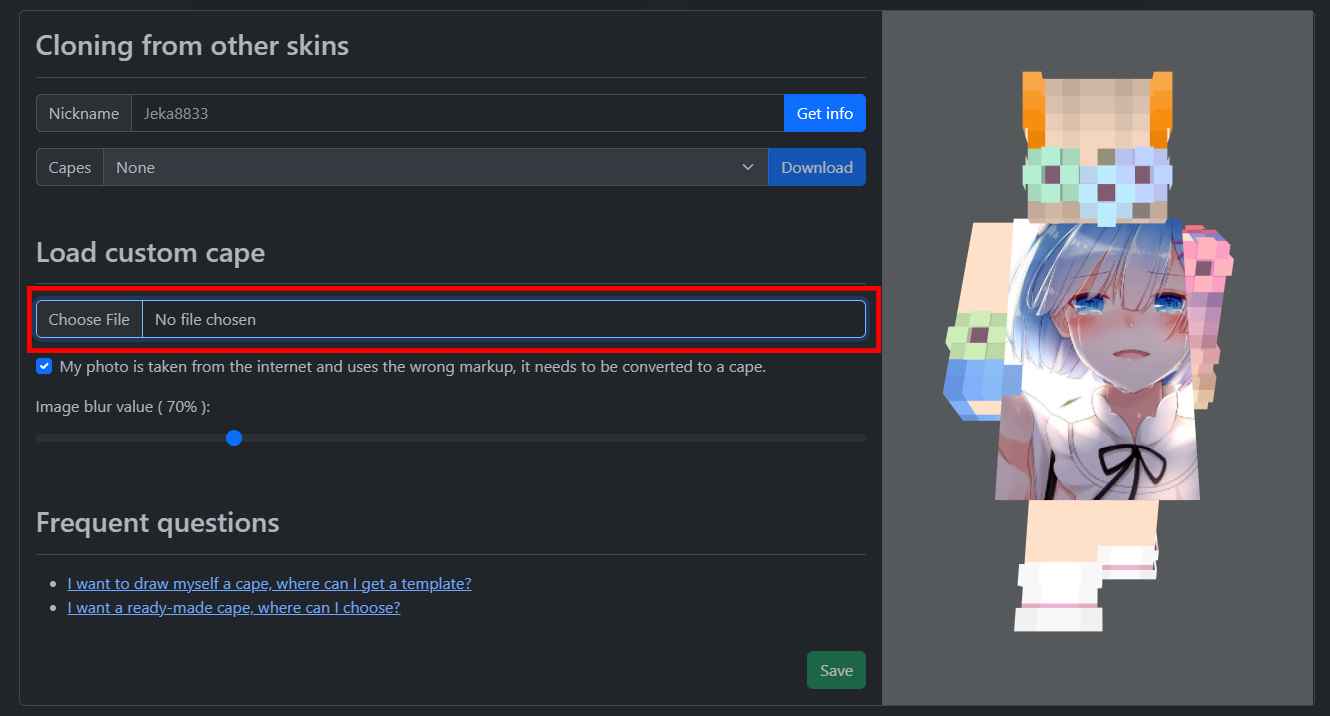
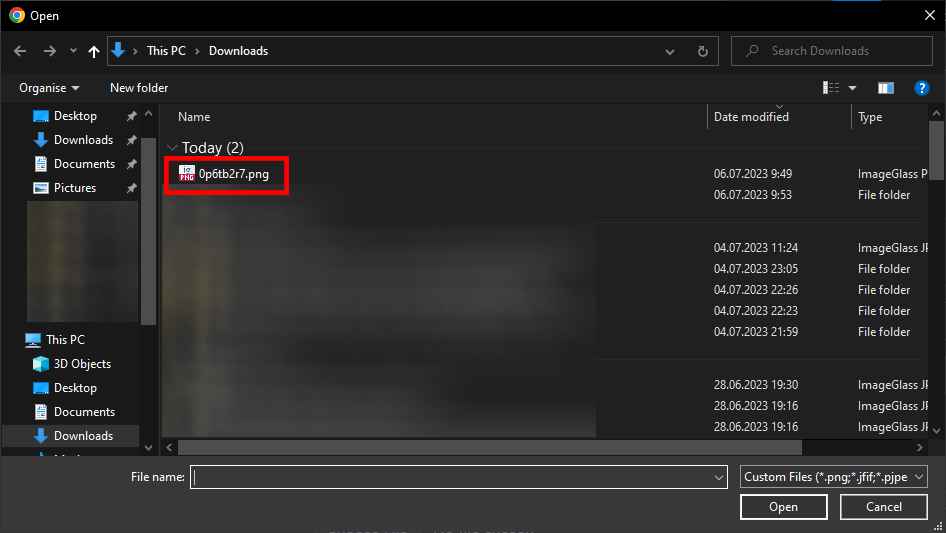
Step 5: Press the file selection field.
Step 6: Select the cape file you have downloaded, everyone's download path is different, so you will have to search for it yourself. The name of the file is also different for everyone. If the file does not appear in the list, you need to change the format of the image to .jpeg or .png, convert it using online services.
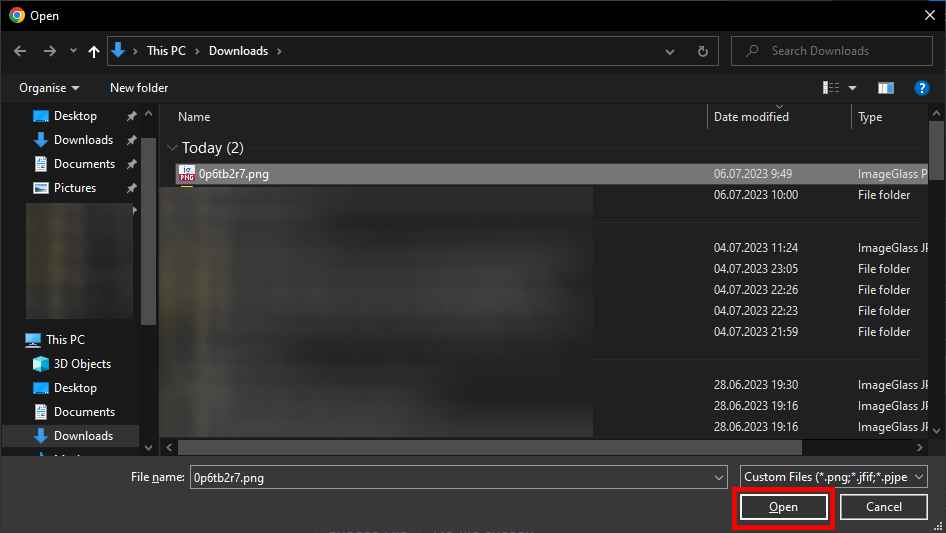
Step 7: Once you have found the file, press the "Open" button.
Step 8: Uncheck the box for "My photo is taken from the internet and uses the wrong markup, it needs to be converted to a cape".
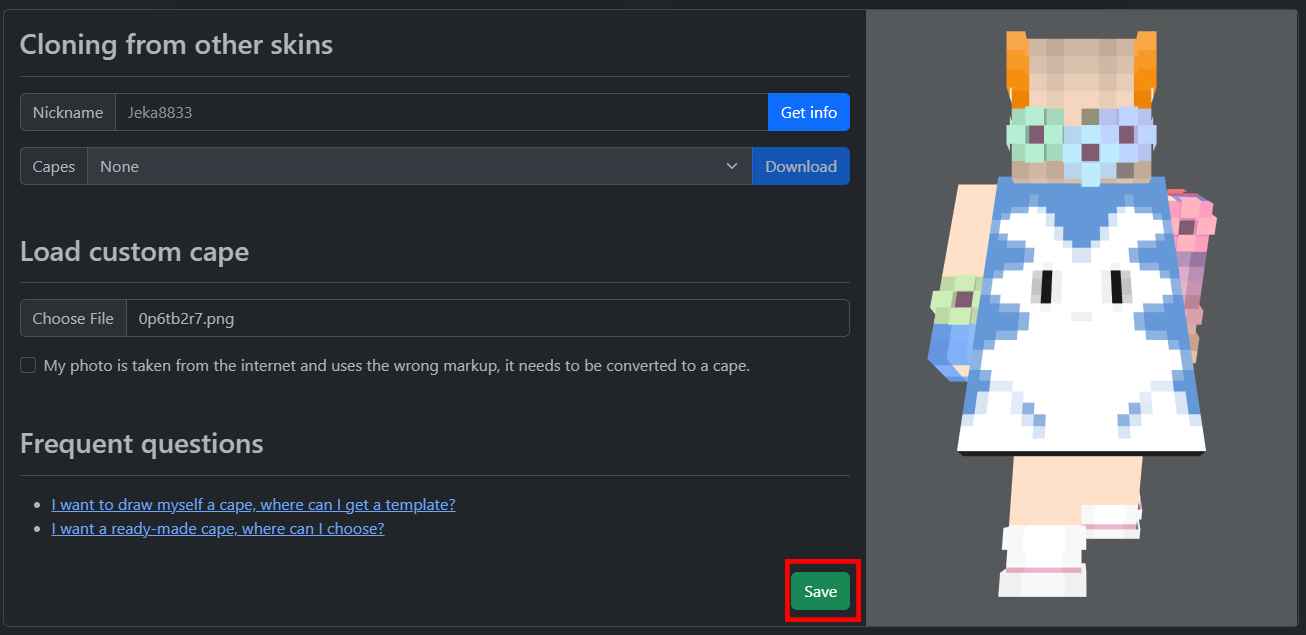
Step 9: Click on the "Save" button.
Step 10: Click on the "Select" button to select the TNTClient cape.
Step 11: Click on the "Save" button and wait five minutes.
Step 12: Press the "Reload capes" button to reload the cape. If you do not see the cape, press the button again after 5 minutes.
Step 1: Click on the "Edit" button.
Step 2: Download your favourite image. The format of the image must be .png or .jpeg. If this is not the format of your image, convert it with the help of online services.
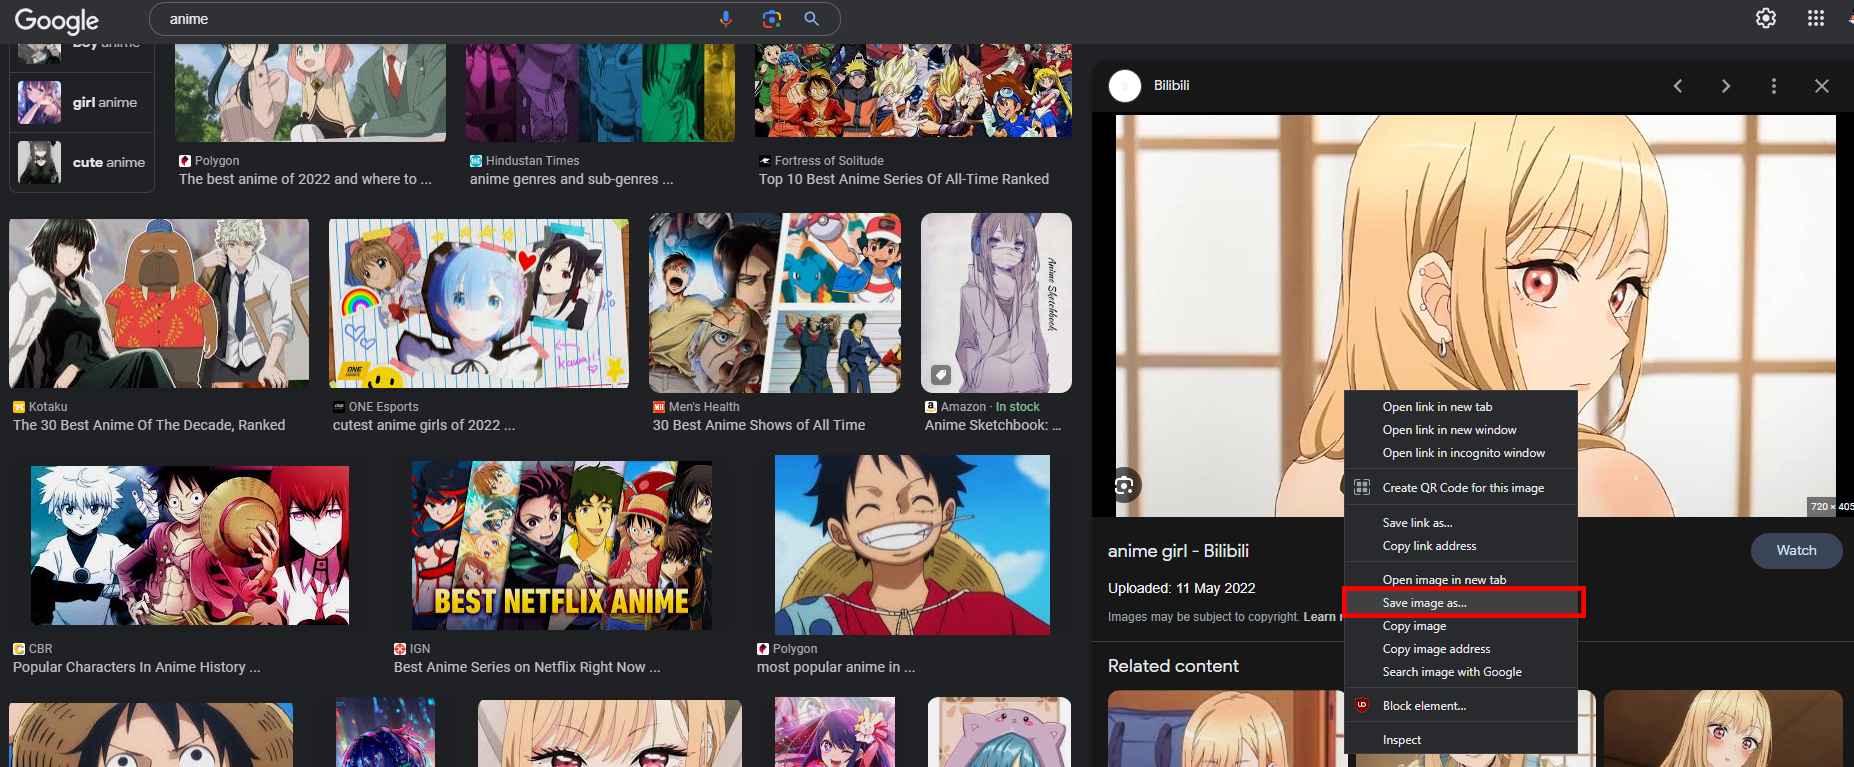
Step 3: Press the file selection field.
Step 4: Select the cape file you have downloaded, everyone's download path is different, so you will have to search for it yourself. The name of the file is also different for everyone. If the file does not appear in the list, you need to change the format of the image to .jpeg or .png, convert it using online services.
Step 5: Once you have found the file, press the "Open" button.
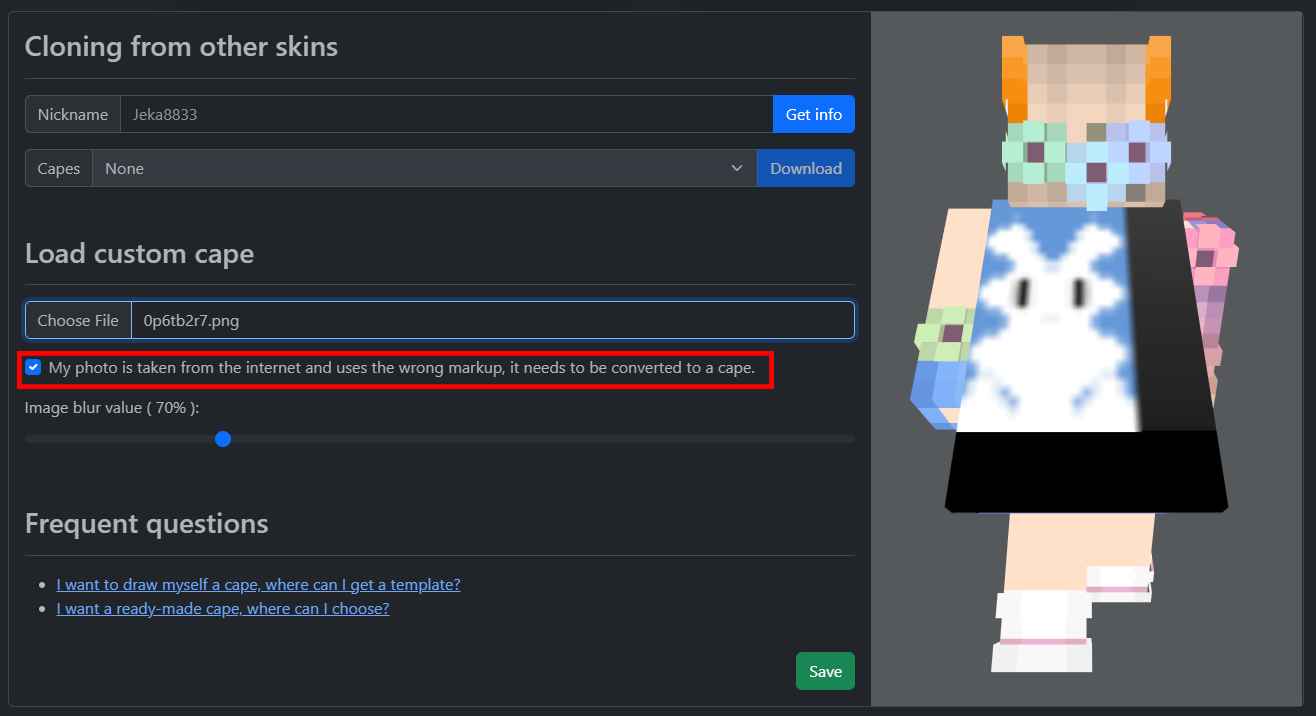
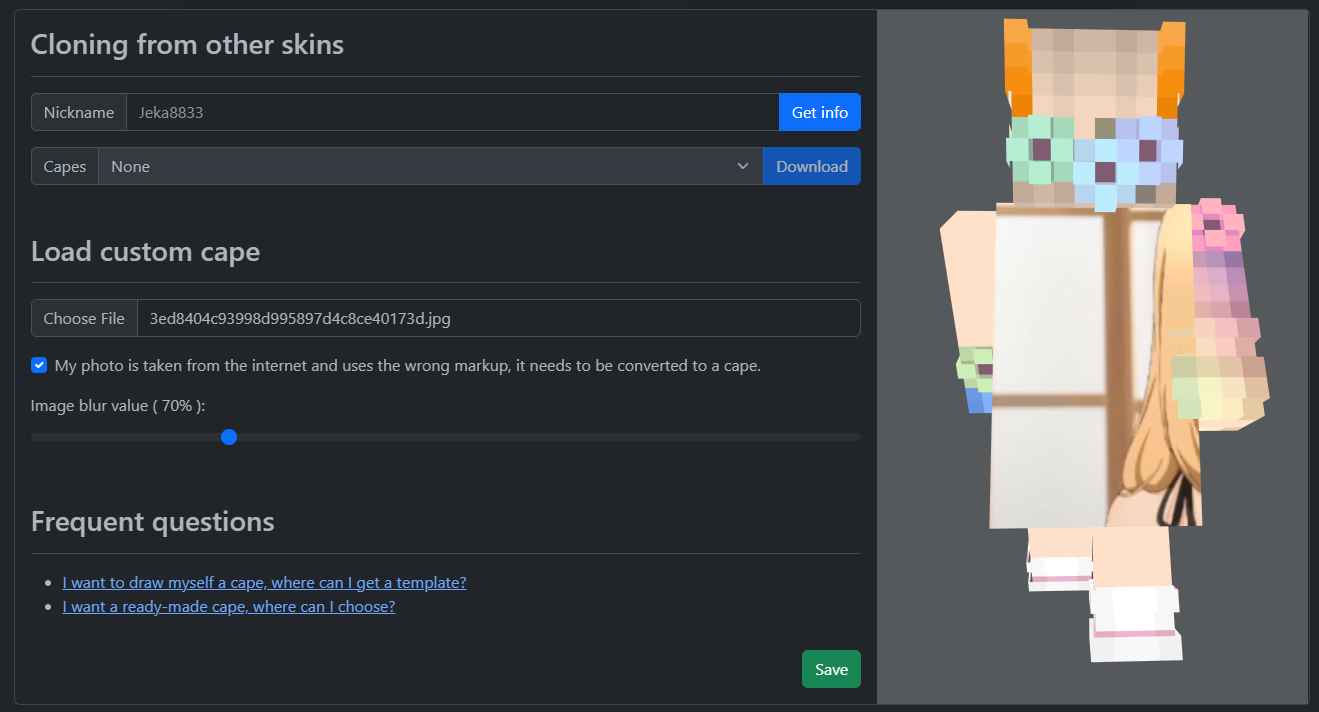
Step 6: Check the box for "My photo is taken from the internet and uses the wrong markup, it needs to be converted to a cape".

Step 7: If you are happy with the result, you can skip the steps marked as "optional". I don't like this result, so I'm going to process the image manually. This behaviour is caused by the fact that the image from the internet does not match the 2/3 aspect ratio.
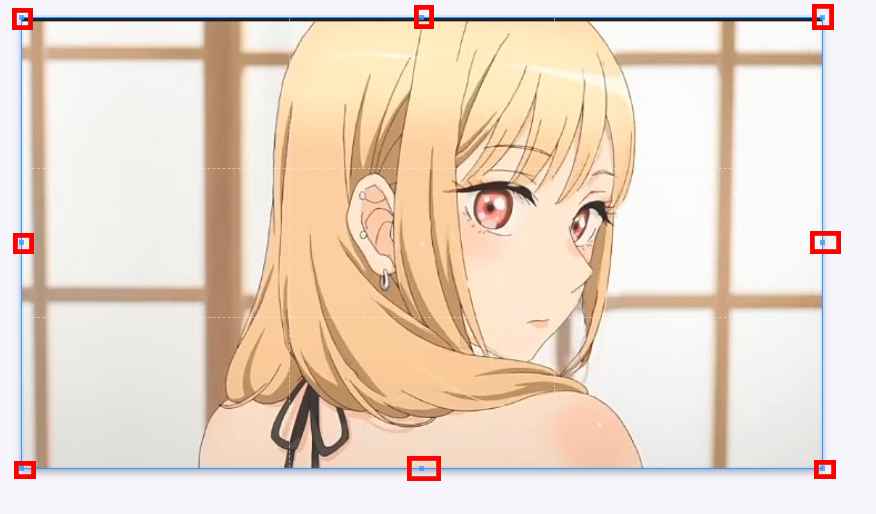
Optional Step 8: Go to the website: https://www.iloveimg.com/crop-image. And press the "Select Images" button.

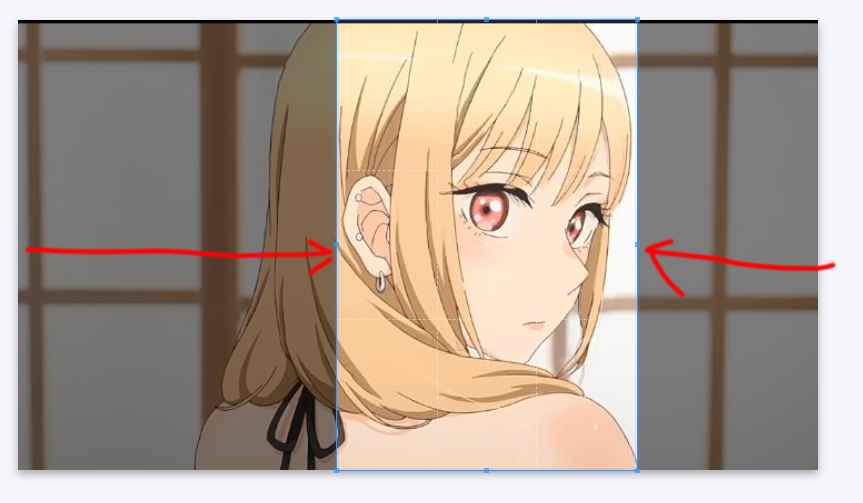
Optional Step 9: Stretch the sliders I have highlighted to full size.
Optional Step 10: I know that maths is difficult, but next comes the formulas. We need to determine which formula we should use. If width > height, we use formula 1, and if width < height, we use formula 2.
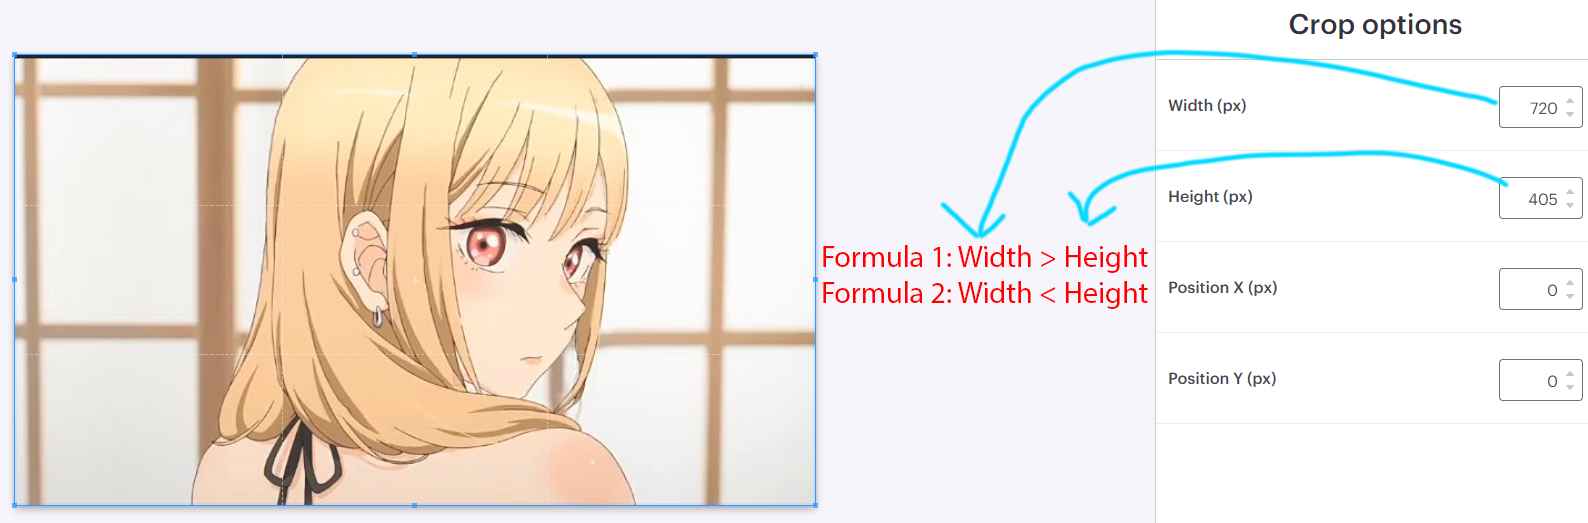
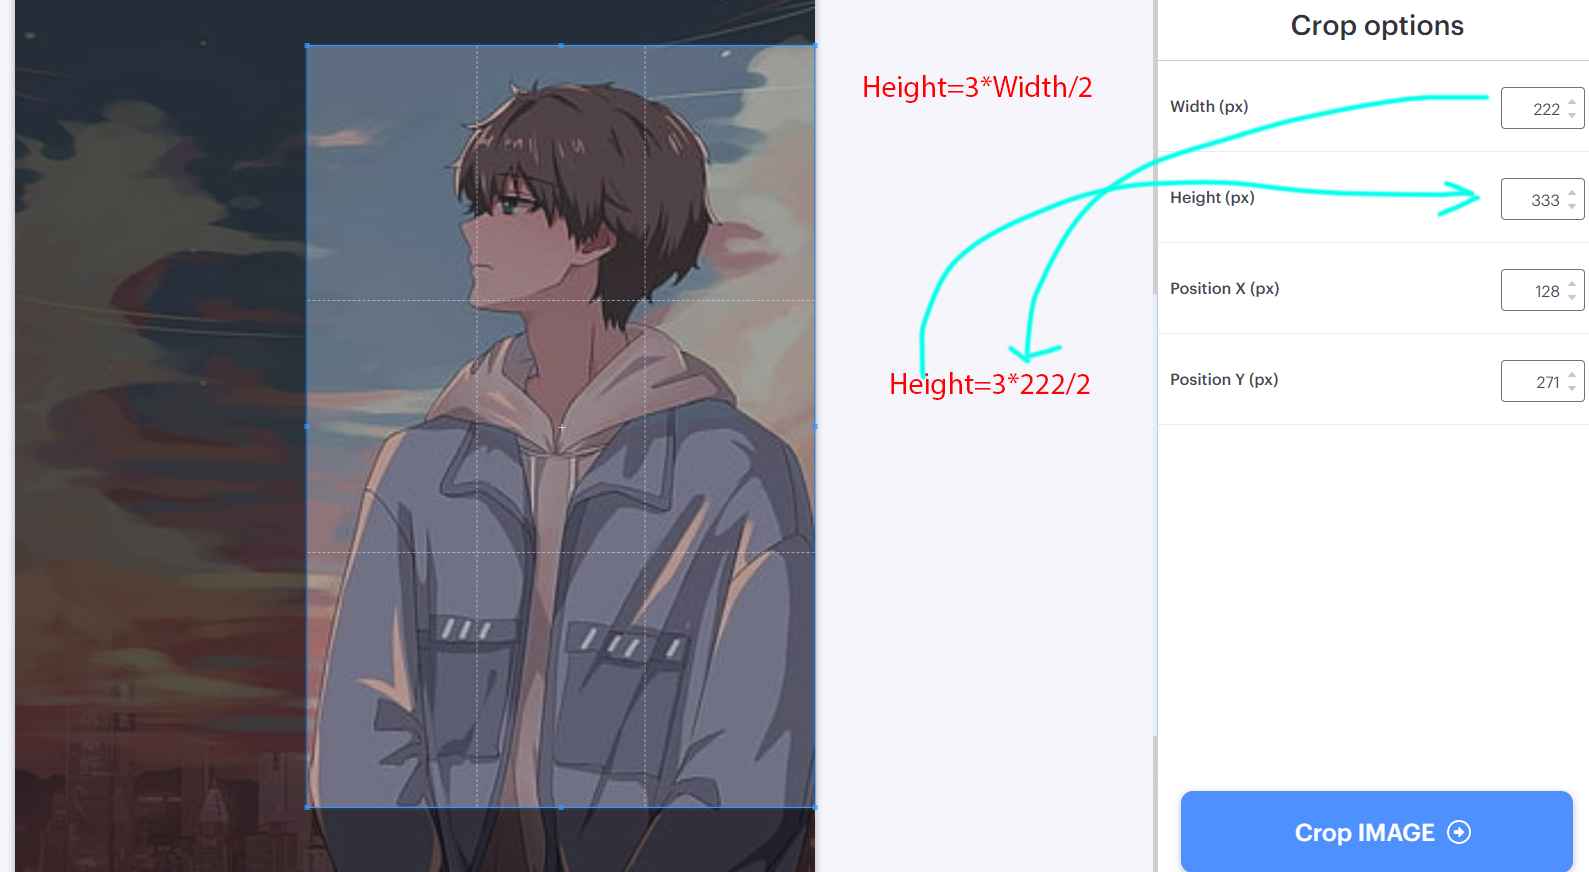
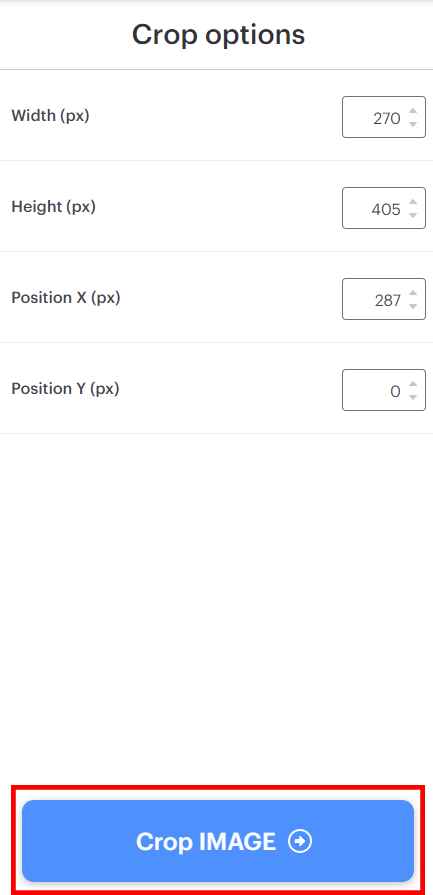
Optional Step 11: Calculate the dimensions of the image.
If you have formula 1, it looks like this: Width=2*Height/3. You need to substitute the height in the formula and get the width. Use a calculator for these calculations, round up.

If you have formula 2, it looks like this: Height=3*Width/2. You need to substitute the width in the formula and get the height. Use a calculator for these calculations, round up.
Optional Step 12: Move the blue frame to the desired location. You will see the highlighted area on the cape.
Optional Step 13: Click on the "Crop IMAGE" button.
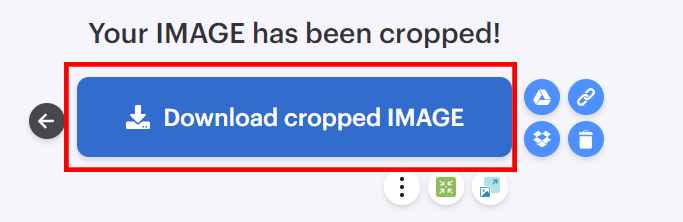
Optional Step 14: Click on the "Download cropped IMAGE" button.
Optional Step 15: Press the file selection field.
Optional Step 16: Select the cape file you have downloaded, everyone's download path is different, so you will have to search for it yourself. The name of the file is also different for everyone. If the file does not appear in the list, you need to change the format of the image to .jpeg or .png, convert it using online services.
Optional Step 17: Once you have found the file, press the "Open" button.
Optional Step 18: Check the box for "My photo is taken from the internet and uses the wrong markup, it needs to be converted to a cape".
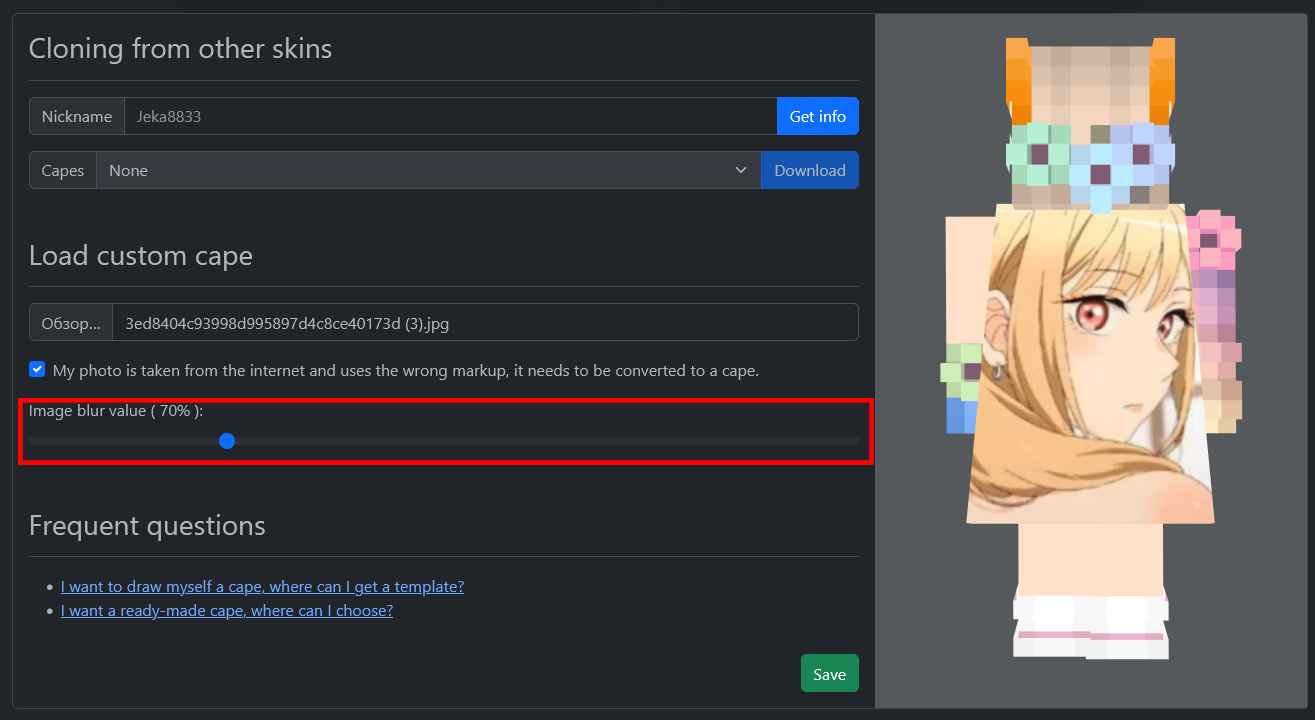
Step 19: Play with the slider and get a better result.
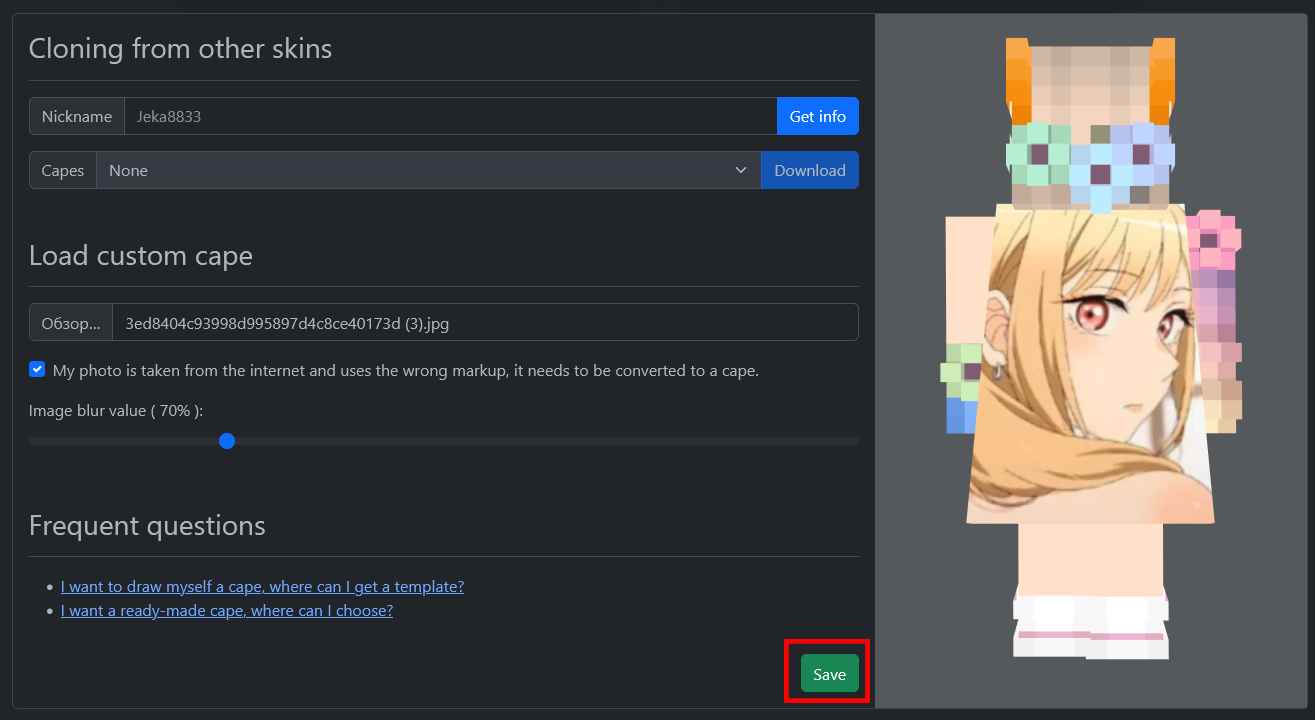
Step 20: Click on the "Save" button.
Step 21: Click on the "Select" button to select the TNTClient cape.
Step 22: Click on the "Save" button and wait five minutes.
Step 23: Press the "Reload capes" button to reload the cape. If you do not see the cape, press the button again after 5 minutes.
It's not difficult, but you'll need basic skills with any image processing program. But if you don't have those skills, it's going to be a long process for you. If you have them, read the quick guide and I think you'll get the hang of it. The guide can be found here: